How to install Sims 4 Mods
Discover how to install Sims 4 Mods on your computer with just a few simple steps! Begin by opening your Downloads folder and right-clicking on the recently downloaded file. If you’re using the WinRar application, you’ll notice an icon resembling a stack of books. Click on it, and a pop-up will appear with an option that says “Extract to (mod name).” Once you click on it, the file will be extracted into a folder. Open up the folder and inspect all the downloaded items. Most of them will end with .package, which is the file type specifically used for Sims 4 mods and custom content.
While you may come across other file types like images or .txt files, you can safely discard them. However, if you see file types like .ts4script, .bpi, .blueprint or .trayitem, don’t worry! These are also Sims 4 file types, and we will show you how to install them below. But, don’t delete them just yet! Keep reading to learn how to install Sims 4 Mods easily.
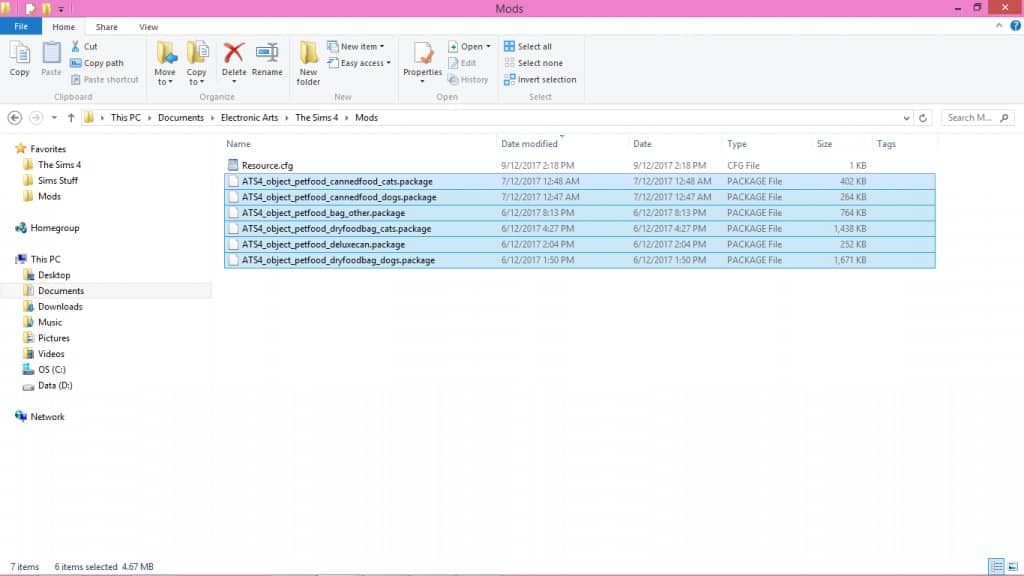
Begin by highlighting (using your cursor to draw a box around) the .package files in the folder. Then, right-click on them and select “cut”. Next, navigate to your Sims 4 Mods folder by going to Documents > Electronic Arts > The Sims 4 > Mods. Once you’re in the Mods folder, right-click anywhere within it and select “Paste”. The .package files you downloaded will then appear in the folder.
Congratulations! Your mod or custom content should be ready to use when you launch the game. You’ve successfully learned how to install Sims 4 mods.

How to install Sims 4 House / Lots Mods
Expand your Sims 4 game experience to include custom lots by learning how to install Sims 4 Lots Mods in this chapter.
Lots refer to any houses or venues in the game that your Sims can visit, and you can download custom lots from various Sims CC websites. Installing and downloading lots follows the same process as we introduced earlier, but you’ll need to place these files in a different location in your Sims 4 folder.
To learn how to install Sims 4 House Mods, follow the instructions we discussed earlier. Once you’ve extracted your files, paste them into Documents > Electronics Arts > The Sims 4 > Tray. Remember, any downloaded file that ends in .bpi, .blueprint, or .trayitem belongs ONLY in the Tray folder.
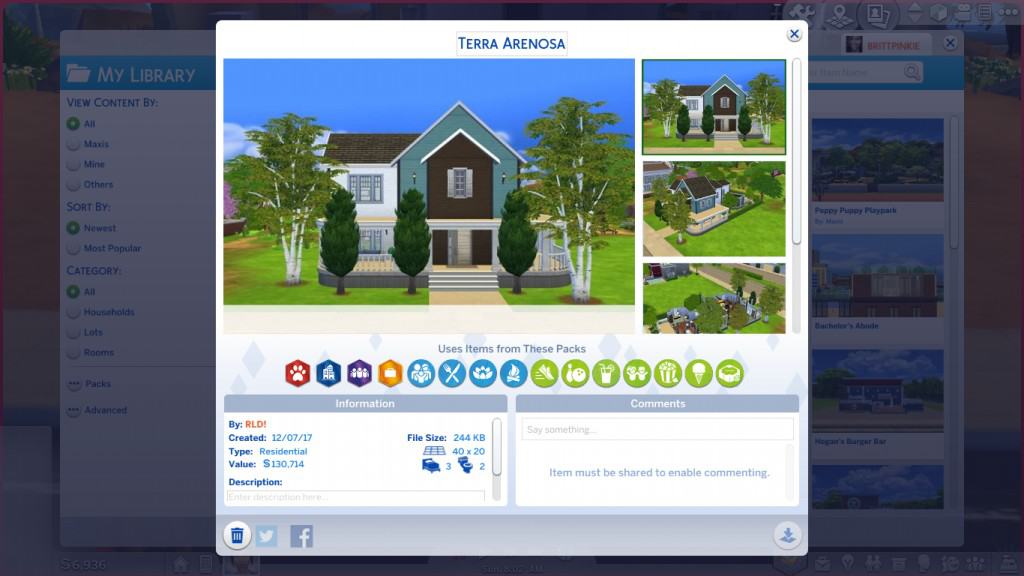
When you open up your Sims game, go to the Gallery (the icon of photos in the top right corner), and click on My Library. There, you’ll find the lot you’ve downloaded, and now you know how to install Sims 4 House Mod as well.
If the lot includes custom content, you’ll need to know how to install Sims 4 Lots Mods with this customization. Click on the Advanced option in the Gallery and tick “Include Custom Content” for the lot to show up.
Now, you can place the lot anywhere in your game and enjoy your new custom content!

How to install Sims 4 Script Mods
If you’re wondering how to install Sims 4 Script Mods, let us first explain what they are. Script mods change and add to the game’s scripting, such as custom careers and animations/interactions. Popular mods like McCommand Center and WickedWhims fall under this category as well.
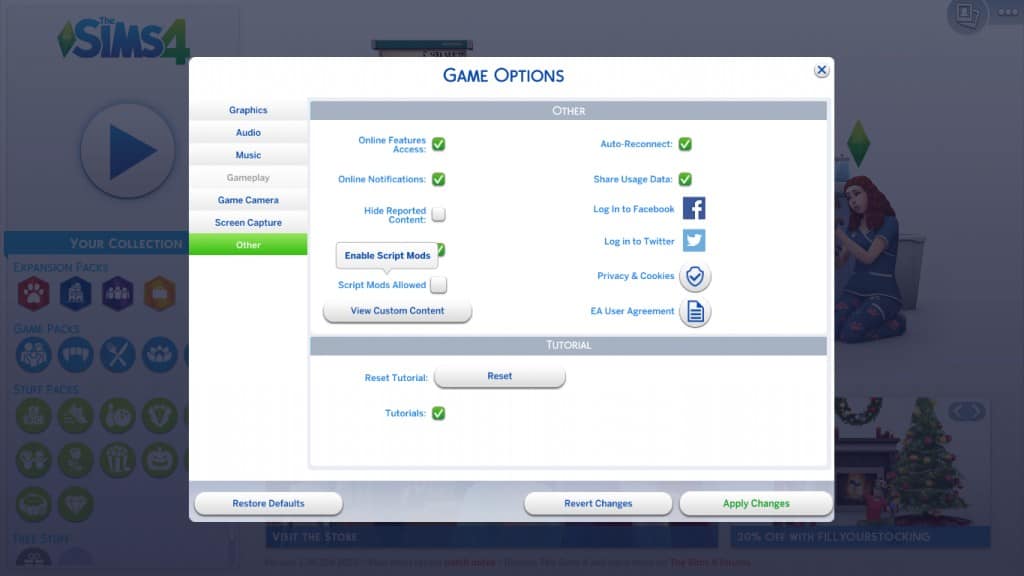
You may have a general idea of how to install Sims 4 Script Mods. Installing them is similar to the other mods we discussed earlier, but the difference is that their file type ends in .ts4script. You’ll still place them in your Documents > Electronic Arts > The Sims 4 > Mods folder, but it’s crucial to enable Script Mods in your game settings.
To do this, click on the Menu (located at the top right corner with three buttons), select Game Options, then Other, and tick the “Script Mods Allowed” button. You’ll receive a warning about script mods, but don’t worry about it. Click OK, Apply Changes, and restart your game.
Your script mod will now be functional the next time you play! Congratulations, you’ve learned how to install Sims 4 Script Mods and can now enhance your Sims game.


